- 130661
- 28-07-2020
- Author: Mysekret Team
- 2
Every woman and girl must know the simple rules of applying makeup. They will always help you look beautiful and well-groomed without harming your skin.
Where does the great mystery of makeup begin, what is the correct sequence of actions, what important secrets do makeup artists know - we tell you all this in order.
Basic makeup rules
The entire art of makeup is built on basic principles. You need to be responsible when choosing cosmetics: buy them in trusted stores, remember that good products cannot be cheap. High-quality products will not cause problems with application. Low-priced cosmetics often contain low-grade ingredients that can cause skin problems.
The individual characteristics of the face cannot be neglected. Not only the shade of foundation, but also the color of eye shadow, lipstick and blush depends on your skin tone.
Select a makeup base that is suitable for your skin type (oily, dry, normal or combination) so as not to provoke peeling or acne. Women with sensitive skin or those prone to allergies should study the packaging of makeup products especially carefully.
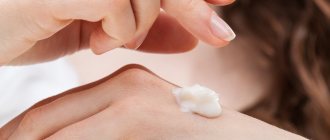
- Before applying makeup, you need to wash your face to cleanse your face of dust and sebum, even if they are invisible. Use special products (gel, milk, lotion) or just water at a comfortable temperature.
- If you plan to cover your face with foundation, you must first apply a base and/or cream. This will preserve both the makeup and the skin.
- Paints better in good lighting. If you are planning an indoor event, artificial light is better, if outdoors - natural light (if possible). The light should fall on the face evenly from all sides.
- It is important to follow the correct sequence of applying makeup to the face.
- You should apply makeup with tools specially designed for this purpose: brushes, applicators, sponges, which must be kept clean, otherwise bacteria will multiply on them.
- The neck also needs care and the application of corrective products.
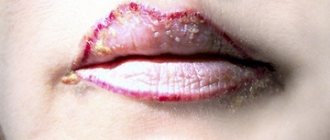
Preparing lips for makeup
Before applying decorative cosmetics, it is advisable to use a lip scrub. If it is not available, you can make it yourself from sunflower oil and sugar.
- Remains of the scrub can be removed with a napkin.
- You can do without it, just wipe your lips with a special product.
- You need to start your makeup by applying a balm.
- The lips need to be outlined and painted over two-thirds.
- For lip makeup, it is advisable to take a brush.
- After applying lipstick, it is better to remove excess with a napkin and apply the next layer.
- At the end you need to smooth out the border with a pencil.\
Sequence of applying cosmetics
The sequence of applying makeup to the face is observed so that the layers of cosmetics do not overshadow each other and are not smeared for as long as possible.
- Cleansing and moisturizing. Wash your face; if your skin is dry, spray it with a moisturizing spray.
- Applying the base (if there is no primer, you can use cream).
- Even out skin tone by applying foundation and, if necessary, concealer.
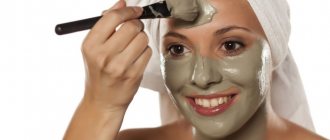
- Contouring and use of loose cosmetics: blush and setting powder.
- Eyebrow shaping.
- Applying and blending shadows.
- Drawing and lining the eye contours, drawing arrows.
- Eyelash dyeing.
- Lip contouring and lipstick application.
How to properly apply makeup on your face?
If you are starting to learn the rules of makeup from scratch, first of all figure out in what order to apply cosmetics. See our step-by-step photo instructions on how to apply makeup on your face!
1
Cleansing and moisturizing
Absolutely any make-up - daytime, evening, art make-up - needs to start with preparing the skin. Cleanse your face and apply moisturizer. To enhance its effect and tone the skin, do a light facial massage with your fingertips.
© Makeup.ru
2
Makeup base
Distribute the primer - it will prepare the skin for applying makeup and prolong its durability. We talked about how to choose your ideal product in this material.
© Makeup.ru
3
Concealer
At this stage, apply your base foundation to your skin. It doesn't have to be foundation; choose the texture and shape that suits you best. Our simple test will help you understand the issue.
© Makeup.ru
4
Sculpting
If you want your facial features to look more chiseled and expressive, get contouring. In evening makeup, “full” contouring using dark and light sculpting is appropriate, and for daytime or, for example, delicate wedding makeup, light sculpting is suitable, as in the photo below.
© Makeup.ru
5
Concealer and corrector
Hide spotty skin imperfections - redness, pimples, scars - with a thick corrector, and apply a lighter concealer under your eyes. If you are planning a bright accent on your eyes, do your eye makeup first, and only after that apply concealer so that crumbling shadows and mascara do not spoil your tone.
© Makeup.ru
6
Blush
Blush can be dry or cream - the latter provide a more natural result. But in any case, blend the product properly so that there are no bright streaks or spots left on your face.
© Makeup.ru
7
Highlighter
Use highlighter if you want to add radiance to your face, giving it a fresher and more youthful appearance. Highlighter is appropriate for both daytime and evening makeup: it all depends on the intensity of application and texture of the product. In everyday makeup, you should not use a highlighter with large shimmer particles.
© Makeup.ru
8
Consolidation
Use powder and/or setting spray to make your makeup last as long as possible.
© Makeup.ru
We tell you more about the different stages of applying makeup, as well as how to even out your complexion, in our video tutorial.
What is facial contouring?
Contouring (contouring, sculpting) is a technique for giving the face the desired shape and emphasizing the desired features using cosmetics.
Contouring your face will help you follow the correct sequence of applying makeup to your face.
This makeup method is based on the role of chiaroscuro - by darkening or lightening a certain area of the skin, visual correction can be achieved.
Stage 3. Correcting the oval of the face and adding relief
Next in order of application to the face are blush and contouring products: bronzer and highlighter. In the previous stages, we achieved the ideal skin tone, but foundations slightly “erase” the natural texture of the face. Therefore, now our task is to make the image lively and natural, without the effect of a mask.
How we do it:
- We highlight all the prominent places with a highlighter: touch the middle of the forehead, the bridge of the nose, the point under the nose, the chin and the top of the cheekbones. An angled fluffy brush or a fan brush is suitable for this, and if the product is creamy, you can apply it with a sponge.
- Darken the periphery of the face with bronzer. We apply this product to the temples, the area between the neck and chin, and also under the cheekbones.
- We complete the correction with blush: put it on a fluffy brush and lightly touch your cheeks. The shade that suits you is the one that is closest to the color of your natural blush.
Contouring the T-zone and cheekbones
An important stage that will highlight the beauty of a woman if you follow the sequence of applying makeup and pay attention to the shape of your face.
It can be round, square, triangular, oval and heart-shaped - it’s easy to determine if you look in the mirror.
Contouring has general rules:
- Start with the nose - use the corrector to draw 2 lines along the sides of the bridge of the nose to the very tip. The more you need to lengthen the nose, the higher (up to the eyebrows) the lines begin.
- Use bronzer to darken the hollow under the cheekbone. It may not be noticeable. To determine its location, it is enough to draw a mental line from the ear to the edge of the lips - on this line there is a depression.
- Darken the forehead: apply bronzer from above, from the hairline, moving to the sides, outlining the oval of the face.
- Darken the areas of the upper eyelids.
- Highlighting: use a highlighter to highlight the bridge of the nose (a straight line between the dark stripes already drawn), the center of the forehead, the corners of the eyes and the cheekbone (a little above the bronzer).
- Use brushes to blend the applied products to make your face look natural. There should be no sharp boundaries.
There are additional recommendations for each face shape.
- Round. This geometric figure is drawn mainly from the cheeks, so special attention should be paid to them: highlight the cheekbones well, make the side lines longer. The face is also drawn out by lightening the bridge of the nose (you can start the highlighter strip from the middle of the forehead), light “triangles” under the eyes closer to the nose and a light chin.
- Square. It is necessary to soften the clear “angles”: the sides of the forehead and chin. It is wiser to darken these areas, and lighten the area around the nose (the triangle from the inner corners of the eyes to the lips).
- Triangular. To visually narrow the forehead, it will be effective to darken the sides. The smoother the lines of the chin, the more harmoniously it will blend with the rest of the face.
- Oval. The most proportional type that doesn't require much contouring. If desired, you can touch up your cheekbones with bronzer or blush and darken the side of your nose further to make it neater.
- Heart-shaped. With this face shape, you can’t go overboard with contouring your cheeks. A light, not very dark line is enough. As with a square face, darkening the forehead will work here, but on the lower part of the face dark lines should be avoided.
How to apply highlighter?
© Makeup.ru
Highlighter is a foundation that creates delicate “highlights” on the face and thereby provides the effect of skin as if illuminated from within.
- The texture of the highlighter can be creamy, dry or liquid.
- It is recommended to distribute cream and liquid highlighter with your fingertips or a small artificial brush, and dry highlighter with a flat natural brush.
- The highlighter may contain small shining particles - shimmer. This product is best used in evening makeup. But a highlighter with a delicate satin glow will also come in handy when creating a daytime look.
Advice! If you have oily skin, you shouldn't buy a highlighter with noticeable glitter; it may look like oily glitter on your skin.
- For a detailed beauty dossier dedicated to highlighter, follow this link.
As a rule, highlighter is applied to those areas that need to be highlighted, “highlighted”. Here are the main ones.
1
Cheekbones
© Makeup.ru
Blend the highlighter along your cheekbones to enhance your features. It is in this area that the largest amount of highlighter should be concentrated.
2
Above and below the eyebrow
© Makeup.ru
To balance your makeup, apply highlighter above and below your brow bone. Among other things, this trick will help visually make your eyebrows more neat and sophisticated.
3
bridge of the nose
© Makeup.ru
Also apply highlighter along the bridge of your nose to visually narrow it. But don't add highlighter to the tip unless you want to visually shorten your nose.
4
Above the lip
© Makeup.ru
A classic trick from professional makeup artists that will help make your lips look voluminous and sensual. Just add a drop of highlighter to the area above your upper lip.
5
Inner corners of the eyes
Place light translucent “highlights” near your tear ducts to refresh your eyes, and with it your entire look.
© Makeup.ru
The method of applying highlighter directly depends on its texture. Learn more about each in this video tutorial.
Chin and neck correction using contouring
Chin makeup will be the last step in creating the ideal face shape. If it seems too massive, it is darkened on the sides, and highlighter is applied in the center and up to the upper lip. For other types, the chin is usually completely light and only slightly emphasized with a darker tone.
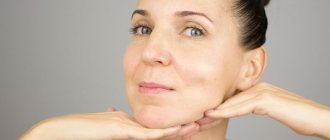
Many people often forget about the neck, which is why it stands out from the general background, which leads to the idea that the girl has a lot of makeup on her face. You need to take care of a smooth transition from the cheekbones to the neck. Foundation and powder are used to disguise small irregularities and wrinkles.
If the neck looks short or saggy, then the solution would be to apply dark tones to the area under the chin. The pronounced depression between the collarbones also looks elegant, so makeup artists darken it.
How to apply blush correctly?
The rules for using foundation and concealer are relevant for any girl. But when it comes to blush, you should start from the shape of your face - it will tell you exactly where to apply it.
For oval (long) faces
© Makeup.ru
Apply blush along the top line of your cheekbones, blending towards your temples. This way you will focus attention on your cheekbones - and distract it from the rounded lower part of your face.
For a round face
© Makeup.ru
If you have a round face, you probably want to make your prominent cheeks look a little smaller. This is very easy to do with blush. First, apply them to the “apples” of your cheeks - to do this, smile and remember where the most protruding part is located. Next, blend the blush, trying to “move” the pigment under the cheekbones.
For a square face
© Makeup.ru
Your task is to soften your facial features. Using circular motions, apply blush directly to the apples of your cheeks to shift the focus to that part of your face.
For a triangular face
© Makeup.ru
To distract attention from an angular jaw, shift the focus of your makeup to the central part of your face. Distribute blush along the upper line of the cheekbones, and add highlighter here.
Advice! A tint can be a successful alternative to regular dry blush: the product provides the most natural result.
Even out skin tone
Before applying basic makeup to your face, you should make sure that your skin has an even, natural tone. Failure to comply with this step will disrupt the entire sequence of actions. To even out the tone, foundations, bronzers or powders are used - the choice of product depends on individual preferences.
- Powder. Its main role in makeup is to secure the cream base. The powder is suitable for everyone because it does not harm the skin if you apply a makeup base or cream to your face before it.
- Tonal products. Their pros and cons cause a lot of debate. An absolute plus is its effectiveness, since a good foundation hides almost any defects and protects the skin from adverse external influences. The downside is that it clogs the pores and prevents the skin from breathing. If the product is of high quality and applied correctly, then even girls with sensitive and allergy-prone skin can use it for daily makeup.
- Bronzers. These are products for giving the skin a tanned look. They are not suitable if you want to do light, light makeup (in this case, it would be wiser to apply it zoned for contouring). They are applied to the foundation. They come in crumbly and creamy versions. If your skin is oily and acne-prone, it is better to use a powder bronzer; if your skin is dry, use a product with a creamy structure.
Level the tone in stages:
- Applying the base product.
- Apply foundation with a sponge or makeup brush. The cotton pad should be slightly damp so that the cream does not remain on it (the wetter the sponge, the thinner the foundation layer will be). When applied, distribute the product evenly using massage or tapping movements. The exception is the cheek area; foundation is applied to them with light movements from top to bottom. It is important to pay attention to hard-to-reach areas - near the wings of the nose, the area near the eyes.
- Removal of surplus. Use a dry sponge or napkin and blot your face a little.
- Eyes. The area around the eyes is delicate, so apply a special concealer slightly lighter than the main tone.
- Consolidation. If the makeup does not involve contouring, apply a setting layer of powder to the face - preferably with a brush.
Stage 1. Create a base
The best base for makeup is clean and moisturized skin. To ensure that your decorative cosmetics apply smoothly and blend easily, be sure to wash your face and apply your usual cream.
The next step is a transparent primer. It will fill in all the small imperfections, make your makeup last longer and save you some foundation.
Only after this can you move directly to the tone and apply one of the products of your choice:
- Classic foundation. Gives medium coverage and is suitable for any time of year and any type of makeup. It is better to apply with a brush or sponge.
- Tonal fluid. A light, liquid product with a serum-like texture. You can gently blend even with your fingers, but it’s better to help yourself a little with a sponge.
- BB or CC cream. A foundation product with additional functions: moisturizes, works with pigmentation and fine wrinkles, protects from the sun. The coating turns out translucent - what you need for daytime makeup in the summer.
- Cream powder or dense mousse. Ultra-dense textures that are best applied with a brush. Use them to reliably hide redness on the skin or create an evening look.
Eyebrow shaping
If your eyebrows are in order and there are no extra hairs around them, then it’s time to start applying cosmetics to them. The most popular products: pencil, lipstick and eyebrow shadow.
Pencil and lipstick are easy to use and easy to remove. Minus - the lines may look too sharp and unnatural , so it is better to choose shades that are not too dark.
- Apply eyebrows with a brush.
- Draw a border within which you want to darken.
- Use neat but confident strokes to fill in the eyebrow, darkening both the hairs and the skin.
- Remove excess strokes.
- Smooth your eyebrows again with the brush.
Shadows are a more durable product, but it will also be more difficult to correct unsuccessful makeup. You need to be careful with the amount of shadow you apply to make your eyebrows look natural. The application process is identical to a pencil, only the cosmetics are applied with a special brush.
If you can’t correct your eyebrows by plucking them with tweezers, you can purchase special stencils or contact a stylist for long-term coloring.
Stage 4. Shaping the eyebrows
The next most important task is to shape the eyebrows: they are the ones who “hold” the face and give it expression. If you are limited in time and are wondering which step to skip, I still advise you not to sacrifice the beauty of your eyebrows. It is better to leave the eyes or lips untouched.
The procedure for applying eyebrow makeup is as follows:
- Comb and style your hair in the right direction using a brush. If you do this every day, your eyebrows will grow better and keep their desired shape. In addition, the brush helps remove dead skin particles and fallen hairs - this is a kind of peeling for the eyebrows.
- If you want to correct the natural shape and shade of your eyebrows, pick up a pencil or brown eyeshadow of the desired color. Draw the outline with light strokes and then fill it with color. Try to move not along the skin, but along the hairs themselves - this way the result will be more natural, and the eyebrows will not seem drawn on. Our task is simply to make them a little more expressive.
- Blend the pencil or shadow to soften the color. For this you will again need a stiff brush.
- Fix the hairs with transparent gel or special wax. You can use eyelash primer instead.
If you are applying eye shadow, apply it using a flat brush with an angled edge. And remember about alternative products: you can also shape your eyebrows using colored gel or fondant.
Drawing arrows and eye contours
The arrows help to enlarge the eyes and give expressiveness to the look.
Use 3 products: eyeliner, eye shadow and pencil:
- Pencil is an option for girls with no experience in applying makeup. It is comfortable and easy to wipe off. The downside is that it doesn’t last as long as other cosmetics and can fall off if you don’t set the edges of the eyeliner with powder.
- Eyeliner is a more durable product, and the arrows with it turn out more expressive and neat. It requires experience to use it. At first, you can use a felt-tip eyeliner (it has a thin tip and does not smear).
Eyeshadow lines look harmonious, but due to the crumbly structure, it can be difficult for beginners to apply them strictly along the contour of the eye. Less popular remedy.
The rules for drawing arrows and eye contours are similar for any cosmetics.
- Line the upper eyelid along the lash line. Start from the inner corner or from the middle of the eye, depending on the desired result.
- Mark with a small dot where the tip of the arrow should end.
- If necessary, thicken the eyeliner line and smoothly connect it to the mark.
- Adjust the “tail” of the arrow.
- Bring the lower eyelid as close to the eyelashes as possible. This item can be omitted if you need light makeup.
Video lessons
A visual aid for those who want to learn how to paint quickly and beautifully. But remember that the main thing in this matter is practice. Practice constantly, make mistakes, correct yourself, and after some time you will learn how to create beauty in 5 minutes.
Light makeup for every day
Arm yourself with all your makeup and start experimenting. Only if you devote at least 10 minutes to makeup every day can you become a good makeup artist for yourself.
Simple budget make-up
Not every girl can afford expensive premium cosmetics, but everyone should know how to look expensive for little money.
Evening makeup for going out
Beautiful makeup from a professional makeup artist is very expensive, so we must learn how to apply beauty ourselves.
Share with your friends!
Read us in the Zen channel
Applying shadows
Shadows not only decorate the eyes, but also serve as a base for eyeliner, allowing them to last longer.
If the application tools are ready, you can begin.
- Apply eyeshadow base to eyelids.
- Fix the layer with loose eyeshadow of a light shade.
- Apply shadows of the main color to the upper eyelid using patting movements. If additional shades will be used in makeup, then this should be the lightest.
- Apply dark shadows above the outer corner of the eye and along the crease of the upper eyelid.
- Use light shadows or highlighter to lighten the inner corners of the eyes and the line under the eyebrow.
- Blend without leaving any harsh spots.
You need to use bright shadows carefully and make sure that they match the color of your eyes and skin, and not the color of your clothes and jewelry . The shade of the shadows is selected according to the color wheel.
How to apply makeup with a concealer palette?
If a regular concealer is intended to correct minor skin imperfections, then a palette of colored concealers or color correctors (both names are found) is intended to disguise specific problems. For example, age spots, reddish or yellowish complexion, acne marks. Color correction works by having one shade literally neutralize another.
Typically, a palette of colored concealers includes several primary colors.
- The violet color neutralizes yellowness, therefore it is effective in the fight against age spots and dull, yellowish complexions.
- The yellow color “overlays” purple and blue, doing an excellent job of treating spider veins, bruises and acne marks.
- Pink or peach concealer helps disguise dark circles under the eyes.
- Green concealer ideally hides skin redness and pimples.
Beauty blogger Lena Sevelenium tells more about how to properly use a palette of colored concealers (correctors).
How to dye eyelashes?
One of the easiest parts of makeup.
- Hold the brush horizontally.
- Start application from the outer edge of the upper eyelid, using smooth movements from top to bottom.
- Lightly curl the ends of the eyelashes to create the effect of open eyes.
- If desired, also apply makeup to the lower eyelashes.
- When finished, comb your eyelashes with a dry brush (special or washed from old mascara).
For thick and long eyelashes, any high-quality mascara is suitable. Owners of short and sparse eyelashes should choose a product with an effect of volume and length.
The shape of the brush is important: the large number of fibers on it give it length and thickness.
Don't miss the most popular article in the section: Hyaluronic acid in tablets. Benefits, how to take, reviews from doctors and effectiveness.
Oriental style makeup
Everyone has already seen anime girls on the streets and on the Internet. This is a new makeup trend called Japanese style. To bring it to life, you need to lighten your face as much as possible and emphasize your eyes. It is difficult for mulatto women and girls suffering from hyperpigmentation to whiten their skin, so some deviations from the classic anime make-up are allowed. The scheme is as follows:
We lighten the skin, apply powder, no blush is used. If you look at the pictures, you will notice that it is still the same smokey eye, only even more intense.
We don’t paint or lighten our lips. We get the perfect club or New Year's makeup look for a teenage girl.
Photo - Applying turquoise eyeshadow
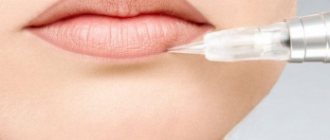
Drawing the contours of the lips
Contouring the lips is not necessary if they are sufficiently defined and voluminous. In other cases, contouring will hide imperfections and complement makeup. A special pencil is used for drawing.
Subsequence:
- circle the depression in the middle of the upper lip;
- outline the middle part of the lower lip;
- draw the sides and corners;
- blend the pencil with movements directed towards the lips.
You can slightly deviate from the natural line of the lips to give them the desired shape.
Don’t miss the most popular article in the section: Plasmolifting of the face - what it is, how it is carried out, results, photos before and after the procedure.
Stage 6. Paying attention to the lips
Lips are the final point in our step-by-step makeup instructions. You can add expressiveness to them with a light shine, tint, matte or shiny lipstick. To get a long-lasting and neat coverage, supplement your usual lipstick with auxiliary products.
How to apply them correctly:
- The best place to start is a clear lip primer. This is a lightweight product with a velvety texture that fills all natural folds and hides flaking. Even matte lipstick will lie flat.
- Outline the outline with a pencil - it should match the lipstick or a little lighter. It is more convenient to first draw the middle, and then bring the line to the corners of the mouth. To avoid an unsightly border, fill the entire surface of your lips with light strokes.
- Use a clean brush to blend the pencil - there should not be a clear outline.
- Load your brush with lipstick or gloss and gently apply it over the base.
You may be interested in: How to contour correctly: instructions for beginners
The makeup is ready, but you can finally use an additional product - a fixative spray for decorative cosmetics.
It prolongs the durability of your make-up and is applied in a few seconds: just spray it on your face. There is another way to apply - spray a fluffy brush with the product and gently brush it over the skin. Share:
Choosing and applying lipstick
When choosing a lipstick color, you should make sure that either your mouth or your eyes are bright, otherwise you won’t be able to focus on anything. Any lipstick is suitable for white teeth, but with yellowish enamel it is better not to combine shades of orange and brown. Also, the color depends on the clothing and type of makeup (daytime/evening).
Application:
- perform lip contouring;
- apply the first layer to the lower lip, starting from the center and gradually reaching the corners;
- repeat with upper lip;
- blot with a dry cloth;
- If it’s not bright enough, apply another layer.
Eye makeup basics: step by step + video tutorials
Step 1: Choose Your Eyeshadow Color
You will need three different shades: a medium shade, a dark shade for the crease, and a light shade for the base and highlight. Try choosing colors from the same color family, for example. Also, keep in mind that different colors can enhance different eye colors. Read articles on how to do makeup for green eyes, blue eyes and brown eyes.
Here are some suggestions:
- For best blending, the eyeshadow should be four different shades: the lightest (the shade closest to white) on the inner corner and right under your brow, the second lightest above the eyelid, the next darkest on the crease, and the darkest on the outer corner.
- If you have blue eyes, you can wear similar shades such as navy, gray and silver. You can also wear contrasting shades such as bronze, brown, copper and taupe.
- If you have brown eyes you can wear similar shades such as bronze, brown and taupe. You can also wear contrasting shades such as blue, green, gray and purple.
- If you have green eyes, you can wear similar shades such as green and forest green. You can also wear contrasting shades such as gold, pink, taupe and purple.
- If you have gray eyes, you can wear similar shades such as blue, charcoal and silver. You can also wear contrasting shades such as brown, gold, green and purple.
- If you have brown eyes, you can use greens and golds to bring out the greens and golds in your own eyes. You can also use contrasting colors such as plum, russet and wine.
Step 2: To make your eye makeup brighter and longer lasting, apply an eye primer.
Or simply use a dot of liquid concealer instead of primer.
Our Expert Agrees:
If you're going to wear eyeshadow, I always recommend using a base or primer. If you place the eyeshadow directly on your eyelid, it won't stay in place.
Video tutorial on applying eye primer
Step 3. Applying a light shade of eyeshadow
Choose your lightest shade. Curl the brush into the eyeshadow and sweep it across the entire lid, from the lash line to the brow bone. Gently blend the shadow towards the corner or and away from your eye. You can leave your eyeshadow on or add extra definition by adding some shadow and color. Read on for a complete step-by-step eyeshadow tutorial and discover the best eyeshadow palettes.
- Consider applying loose powder under the eye, just under the lashes. This will catch any loose eyeshadow smudges. When you are done applying your eyeshadow, you can brush off this powder using a clean brush.
- Some people don't like to have the same highlight color as their base. If this applies to you, you can use an eyeshadow primer to stop your eyeshadow from creasing. Be sure to apply highlighting in the inner corners to open up the eyes and brow bone to give your eyes definition.
Video tutorial on applying light shadows
Step 4: Apply shadow all over your eyelid
Dab the brush over the middle shade and sweep it along your entire eyelid, going from the right next to the inner corner of your eye to the outer corner.
Video tutorial
Step 5: Apply eyeshadow to the crease
Take a smaller brush and brush it over the darkest shade. Draw it along the crease of your eye, going in an arc starting at the outer corner and following the shape of your natural eye socket, or where your eyelids fold when you open your eyes.
Video tutorial on applying eye shadow in the crease
Step 6: Blend Your Eyeshadow
Using a small, fluffy brush, go across the eyelid where the crease meets the crease. Then go above the eyebrow where the crease meets the forehead. When you blend the shadows, sweep the brush from the inner corner of your eye to the outer corner and back to the inner corner in a rainbow motion.
- If you brushed the loose powder under your eye, you can wipe it off after you're done mixing everything together.
Video tutorial on blending shadows
Step 7: Apply Eyeliner
Place the tip of the eyeliner as close to the lash line on your upper eyelid as possible. Slowly draw a straight line from the middle of your eyelid to the outer corner. Then, going from the middle to the inner corner you can extend the eyeliner a little beyond the outer corner, creating a wing tip. Whether you use eyeliner or liquid eyeliner depends entirely on what you find easiest to work with.
Read on for a complete guide to applying eyeliner and check out our rankings of the best eyeliners.
Here are some more rules for applying eyeliner:
- For a natural, daytime look, use a brown or black-brown liner. For a more defined or evening look, use black eyeliner.
- It helps if you hold a pocket mirror in your other hand and look down at the mirror while applying eyeliner.
- You can also partially close your eyes and gently pull the outer corner of your eye, stretching your eyelid. Draw your eyeliner in a neat line.
- You can use eyeliner or eye shadow on the lower eyelid. Eyeliner will give you a more defined look, while a thin line of charcoal or dark brown eyeshadow will give you a softer look.
Video tutorial on how to apply eyeliner
Step 8: Apply mascara
Start applying mascara from the middle of your eye. Dip the brush into the container and pull it out, pulling it along the edge of the container to remove any excess mascara. Bring the brush as close to the lash line as possible and gently pull it upward, wiggling it slightly from side to side. Lower your eyelids at the same time as you pull your brush up. Repeat this process for the outer and inner corners of your eye.
- You can apply a little mascara to your lower lashes. Simply bring the brush as close to your lower lash line as possible and point downwards.
Video tutorial on applying mascara
Step 9: Consider Shading Your Brows
If you don't have very thick eyebrows, you can fill them in. You can use eyebrow pencil or eye shadow. Follow the natural curve of your brow, making the color softer and lighter the closer it gets to your nose. In general, you want to use a color that is two to three shades lighter than your hair color. If you have light hair, use a pencil 2-3 shades darker. Read the article on how to pluck your eyebrows correctly.
Here are a few more rules:
- If you have blonde hair, use a light brown or medium brown color.
- For brown or medium colored hair, use a medium or dark brown color.
- If you have black hair, use a very dark brown color. Never use black as it will be too harsh.
- If you have red hair, use a color close to your hair color, but two or three shades darker.
- For other unusual hair colors, such as blue, green, pink or purple, consider using a shade that matches your hair color and going two to three shades darker. You can play with colors, or use a color that matches your original eyebrow color.
EXPERT ADVICE
Your eyebrows really frame your face, so if you have thin eyebrows, it's a good idea to fill them in a little.
Video tutorial on eyebrow shaping
Differences between daytime and evening makeup
When choosing cosmetics, you need to consider what type of makeup it will be needed for, because there are significant differences between the daytime and evening options:
Daytime - light and natural. It shows the beauty and health of the face. Light shades and pastel colors are used.
Evening makeup is characterized by some heaviness and brightness. Usually catchy tones, black eyeliner, etc. predominate. It takes a long time to apply, but is more memorable.
Required Tools
Many will agree that flawless makeup is hardly possible to do in a dimly lit room with a small mirror in your hand. Therefore, it is better to take care in advance of a large mirror in which you will apply decorative cosmetics, good lighting, and also the availability of the necessary tools. In this case, not a single detail will escape your attentive gaze.
To apply high-quality makeup you will need:
- squirrel brushes for powder and blush - flat and round with a beveled cut;
- sable brushes for lips, eyes and makeup correction. It is important to remember that natural brushes are suitable for dry textures, and with artificial bristles for creamy textures;
- 2 eyeliner brushes (round and flat) with pointed tips;
- 2 flat lip brushes with a “cat’s tongue” cut;
- brushes for shading shadows: round, flat, with cuts;
- flat brush for makeup correction with a “cat’s tongue” cut;
- tweezers - with thin and flat tips, curling iron and eyelash comb, as well as an eyebrow comb;
- foam applicators for eye shadows; sponges and sponges; cotton pads and sticks; paper and wet wipes.
Common Mistakes
Every woman has made mistakes when applying makeup at least once. What not to do:
- neglect makeup base;
- instead of bronzer, use a foundation darker than your skin color;
- apply darkening agents not along the natural line of the cheekbones;
- lighten the tip of the nose with a highlighter - this will make it thicker;
- focus on both the lips and the eyes;
- try to enlarge your lips with lipstick alone, omitting contouring.
Types of beauty blenders for makeup
1 - triangular sponge, 2 - pear-shaped beauty blender, 3 - beauty blender with beveled edges, 4 - mini blender for hard-to-reach places, 5 - drop-shaped classic sponge, 6 - sculpting beauty blender
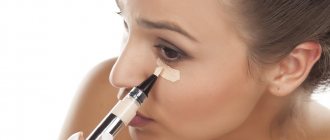
After you have evened out your complexion using foundation, you can use concealer for spot correction of imperfections - for example, dark circles under the eyes, acne and post-acne. Apply a small amount to problem areas and blend thoroughly.
If you don’t like the feeling of “a ton of plaster” on your face, you can get by with a light tint fluid or not use foundation at all. It is not at all necessary to use all of the listed products and do a full face of makeup every day.
Tips from makeup artists
- Professional makeup artists say that the main thing in makeup is not to overdo it. Everything should look as natural as possible. To do this, it is important not to skimp on good cosmetics and take into account your face type.
- A significant role should be given to skin care before and after makeup: washing, masks and peeling must be done regularly.
- Selection of high-quality cosmetics and tools plays a significant role in performing any makeup. It is important not to skimp on these things, because you will have to apply them on your own face.
Makeup is a process that requires practice. But even for beginners there is nothing difficult about it if you use good products and follow the sequence of applying cosmetics to the face and the rules of makeup.
How to choose the right cosmetics
The choice of cosmetics is one of the most important issues, since good cosmetics are inexpensive, and cheap ones do not always please with their quality.
- The foundation should suit your skin type and meet your needs: light texture and color, rich color and high coverage, longevity, extra hydration or mattifying ability. How to choose the right foundation color? When choosing a shade, do not make the main mistake that absolutely everyone makes - testing the product on the wrist. The shade of the hands and face is very different. Apply a small amount of product to the area under your eyes and blend across your cheek. When you go outside, look at yourself in daylight. Stores often make the mistake of turning on yellow lamps, which neutralize redness. This is why when we come home, we are often disappointed in our purchase.
- With lipstick, the main thing is color and texture. Apply a little lipstick to your hand and decide if the texture is pleasant to you. Next, apply it to your lips and take a closer look at the color. Do not test the color on your hand as this will also distort the color. You can apply a little on the inside of your fingers as it is almost the same color as your lips. The only universal lipstick color that will suit absolutely everyone is a cool-toned red (if you rub it on your hand, it should fade to pink).
- powder , and use pressed powder only to throw in your purse and touch up your makeup throughout the day. The crumbly one lays down in a thin, light layer, while the pressed one tends to layer.
- blush , they look as natural as possible. The color can be cold or warm pink, peach.
- mascara is not so difficult. Just decide what you need: make your eyelashes longer or thicker.
- The concealer should be a little denser than the foundation and one tone lighter, but no more.
- Eyebrow pencil or shadow must be brown or gray-brown without “red.” It is best to choose a shade that is a shade lighter than your eyebrows.
- eyeliner based on the principle of shading. Draw a small line on your hand, wait a little and rub it. If the line is practically not smeared, we take it.
What can you save on?
We all know that the more expensive the cosmetics, the better the quality. But there are ways you can save money.
Makeup brushes
Natural brushes are very expensive, while good synthetic brushes cope with this function just as well. Plus, you shouldn’t overpay for the brand. Brushes of an unknown brand are no worse than branded ones. Just touch the bristles, preferring soft brushes. How to choose makeup brushes and how to use them correctly is described HERE.
Mascara for eyes
Good mascara can be bought in any supermarket for literally pennies. Sometimes they are not inferior in quality even to premium products. Many makeup artists today prefer this mascara that increases the volume of eyelashes.
Pencil
A hard, non-greasy black pencil will draw an arrow no worse than expensive analogues. You can also try a fashionable product - the unique Music Flower eyebrow pen.
We have also collected for you other inexpensive analogues of advertised brand cosmetics.
What should you not save on?
The foundation must be expensive and good, since we apply it to our face and live with it all day long. But the most important thing is that the quality of makeup depends only on it. You can have an expensive foundation, but all other products are very cheap and no one will notice. A cheap foundation will be stained, will be too “red” or even look like a mask.
Pomade
A good natural pink lipstick is what you need for every day. It will last you a long time, so don’t waste your money. A good choice is the Huda Beauty matte lipstick set.
Shadows
Cheap ones can become stained and simply blend out poorly. Buy just one palette of natural shades and it will last you a very long time. Makeup artists often choose the Huda Beauty eyeshadow palette.
Loose powder
This is a good investment in your appearance. A jar of this product will last you for 3-4 years, provided that you use it every day. But the whole secret is that it lies down as beautifully and naturally as possible.