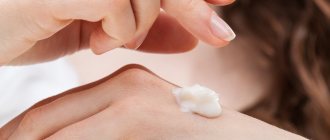
The range of cosmetic products today is so diverse that every customer will be able to choose the most suitable anti-aging face cream for herself. However, purchased products cannot boast of the safety that creams prepared independently at home have.
They are enriched with nourishing base and essential oils, beeswax, glycerin, and other components that promote effective skin rejuvenation. At the same time, homemade creams do not contain hazardous preservatives and parabens, which can only worsen the condition of the skin.
In this article, we have collected very simple, yet effective recipes for homemade anti-aging remedies that eliminate the first signs of aging. In addition to smoothing out wrinkles, such creams have the following benefits:
- perfectly nourish and moisturize the epidermis;
- improve complexion;
- relieve inflammation and irritation;
- help reduce pores;
- give the skin a matte finish.
For wrinkles with cognac
A fairly popular preparation method that demonstrates visible results of rejuvenation on aging skin after 40 years.
All you need is:
- 2 tsp dessert cognac;
- 1 chicken yolk;
- tbsp honey;
- 100 g heavy cream;
- a couple of drops of lemon juice.
To prepare a rejuvenating face cream, just combine all the above ingredients in a convenient container, then heat the resulting mixture using a water bath. The heated mass is kept on fire for 5-10 minutes until a thick cream consistency is obtained.
The finished composition is applied to cleansed facial skin, and after half an hour the remaining product is removed with warm water. For the best effect, it is recommended to first cleanse the face of the stratum corneum of the epithelium using a scrub or peeling.
This anti-aging cream with cognac helps get rid of both wrinkles in the forehead and crow's feet around the eyes.
How to convert percentages to grams
How to make a face cream if you have a recipe, and it’s all in percentages. We need to decide how many grams of cream we need. For example, 30 g of cream is enough for me for a month. I don’t cook large quantities, but prepare a new portion each time. Now we remember the 6th grade mathematics, the topic is “Proportions”. Let's take 30 grams of cream as 100%. To convert all the components in the recipe into grams, you need to multiply the percentage of the ingredient by 30 grams of cream and divide by 100%. This is what we get:
- Olivem 1000 - 5*30/100=1.5 g
- Argan oil – 20*30/100=6 g
- Water - 69.4*30/100=20.82 g
- Provitamin B5 - 3*30/100=0.9 g
- Nuf - 2*30/100=0.6 g
- Preservative - 0.6*30/100=0.18 g
Just in case, we check by addition: 1.5 + 6 + 20.82 + 0.9 + 0.6 + 0.18 = 30 g. So, we calculated correctly.
Now you understand why recipes are written in percentages. It’s convenient for me to perceive the recipe as a percentage. This way I can see how thick the product will be (due to the percentage of emulsifier and oils), what consistency it will be, whether it will foam, if it is shampoo, etc.
Glycerin
This cream is intended for those with oily skin.
Compound:
- ½ tsp. camphor alcohol;
- 2 tsp lemon juice;
- 1 tsp honey;
- 1 tsp glycerin;
- 1 yolk;
- 2 tsp olive oils.
Honey is ground with egg yolk, and then olive oil is added to the mixture. The components are heated in a water bath, while constantly stirring the mixture with a whisk.
Next, slowly pour in the alcohol, add all the remaining products, without stopping the process of stirring the mixture. The cream is left on the face for 20 minutes, after which the residue is removed with water or a cotton pad.
Honey
You will need:
- crushed beeswax – 20 g;
- shea butter – 2 tsp;
- coconut and almond oil - 1 tbsp each;
- rose water – 1 tsp;
- honey – 2 tsp;
- a couple drops of ylang-ylang essential oil and liquid vitamin E.
At the initial stage of preparation, base oils and beeswax are heated in a water bath. Honey diluted with rose water is heated in a separate container.
Be careful not to overheat the mixture during heat treatment, otherwise the honey will lose all its beneficial substances.
Then combine the previously prepared oil mixture with the honey mass and mix the components thoroughly. The resulting consistency is removed from the heat, cooled for 15 minutes, after which liquid vitamin E and ylang-ylang essential oil are added to the cream. Honey anti-wrinkle cream is used twice a day: morning and evening.
Fat phase
This phase includes vegetable oils and an emulsifier. In my recipe we will use the emulsifier Olivem 1000 and vegetable oils: argan, broccoli, black cumin, shea. I tried to combine the oils in this recipe using German technology for combining oils.
If you have not heard anything about this or are preparing the cream for the first time, you can use one argan or sesame oil in the fatty phase. They will also make a good cream, since their fatty acid composition is balanced.
But it is better when the cream uses a mixture of oils, and correctly combined, taking into account the composition of all oils.
In this article I will not dwell on combining oils, but will focus on the moisturizing components of the cream.
Olive
This cream has a fairly rich, thick texture that is absorbed into the skin within 20 minutes. Therefore, we recommend using this recipe as night care for dry epidermis.
It is necessary to mix olive and coconut oil (2 tablespoons each) and heat the ingredients. Then add 1 tsp to the mixture. tocopherol and a few drops of lavender essential oil. To give the cream a lighter, airy texture, the heated mixture should be thoroughly beaten, then immediately cool the resulting consistency.
Aqueous phase
We will use distilled water as the aqueous phase. You need distilled water; boiled or filtered water will not work. This water can be bought at gas stations, gardening stores, and sometimes in pharmacies.
Creams are also prepared using hydrosols. But I read about the opinion that hydrolates lose their properties when heated. I haven’t formed my opinion on this yet, so I simply cook the cream in distilled water. Although I also tried it on hydrolates.
Floral hydrolates can add a pleasant aroma to the cream if you do not flavor it in any way.
But I definitely don’t recommend cooking cream using decoctions of any plants. The decoction, although useful, is a very short-lived product. It stays fresh for a maximum of a day. Therefore, creams made from decoctions will spoil quickly even with a preservative.
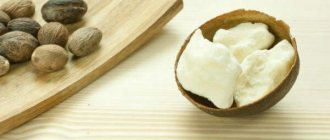
Butter with rowan
Red and black pearls of berries contain large amounts of vitamin C and other organic acids, which contribute to intensive rejuvenation of epithelial cells. To prepare, take a tablespoon of crushed berries and combine it with the same amount of butter. Add honey (1 tsp) to the resulting mixture and beat the ingredients until smooth.
Use the finished nourishing product before bed, applying a thin layer of cream to cleansed facial skin. As a result, facial and static wrinkles are smoothed out, the shade of the dermis is evened out, and the water balance of the epidermis is restored.
General Tips
Since homemade formulations are free of preservatives and other substances that extend their shelf life, prepare a small amount of such creams and be sure to store them in the refrigerator, in a clean, washed jar with a lid.
You can extend the life of your cream by constantly scooping it with a sterile spoon and not with your fingers.
Do not forget that only clean skin can absorb compounds applied to its surface.
Before applying each new product to your face, be sure to test it on the skin of your hand to find out the reaction of the epidermis.
Any cream should be applied to previously cleansed skin.
With gelatin
This product has a cumulative effect, so visible rejuvenation results are possible only with regular use of gelatin-based cream. The cooking process consists of several stages:
- Gelatin (1 tbsp) is diluted in mineral water (1 tbsp), and the resulting mixture is left until the powder swells.
- The infused mass is heated using a water bath until a homogeneous consistency is formed.
- Next, the dissolved gelatin is cooled to room temperature, after which honey (4 tbsp) is poured into the mixture. Mix the components thoroughly.
- After 1 hour, the resulting mass is combined with glycerin (1 tbsp), which is pre-mixed with mineral water (2 tbsp) and salicylic acid (1/2 tsp). To obtain a homogeneous consistency without lumps, it is recommended to beat the components with a blender or mixer.
For different skin types
Before choosing one or another anti-aging recipe, you should take into account the needs of your skin type. For those with oily skin, it is recommended to enrich the product with light non-comedogenic oils such as grape or peach seeds. Fermented milk products have a beneficial effect on the sebaceous glands, which reduce the production of sebum. Essential oils of patchouli, tea tree and eucalyptus have an antiseptic effect. For dry skin prone to flaking, intensive nourishing formulations based on coconut, olive or butter oils are suitable. To maintain the youthfulness of combination skin, you should give preference to anti-aging creams with a whitening effect, which contain citrus essential oils and honey.
For sensitive
The rosehip-based recipe is easy to prepare, but the effect of this product is comparable to expensive luxury creams. Ingredients:
- butter – 1 tbsp;
- chicken yolk – 1 pc.;
- honey – 1 tsp;
- chopped rose hips - 3 tbsp.
Preparing homemade cream for sensitive skin is easy and quick. It is enough to combine all the ingredients in a convenient bowl and stir the mixture until a homogeneous consistency is obtained. Rose hips, if absent, may be replaced with pear or plum pulp.
For problematic
It has a beneficial effect on skin prone to various inflammations and acne, and can also be used in the care of any other type of skin. For best results, it is recommended to apply the composition daily for a month. Compound:
- 2 tbsp. almond oil;
- ½ tsp. lemon juice;
- 4 tbsp. calendula flowers;
- a few drops of lemon essential oil;
- 1 tbsp. beeswax;
- 1 tsp calendula oils.
The inflorescences are poured with hot water and the broth is left to infuse for 30 minutes. Next, add calendula decoction and all remaining ingredients to the wax melted in a water bath, after which the consistency is thoroughly mixed with a whisk.
It is recommended to store the finished cream in the refrigerator . A small amount of the product is applied to the facial skin with gentle patting movements, and then the residue is washed off with warm water.
For dry
All you need is:
- 2 tsp almond oil;
- 1 tbsp. comfrey leaves;
- 1 tbsp. lanolin;
- 2 tsp water;
- 2 tsp fish oil.
First, you should prepare a decoction: pour a glass of boiling water over the herb and infuse the mixture for 20 minutes. Before combining the resulting liquid with the remaining ingredients, the infusion must be strained using a sieve.
Lanolin is heated in a water bath, after which almond oil and water are added. The mixture is cooled to room temperature, and then combined with all other components. The product is used as a mask: 10 minutes after application, the remaining cream is removed with a regular sponge or water.
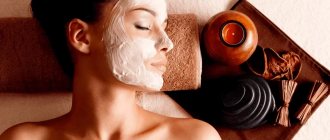
Let's take the matter of beauty into our own hands - make up a cream
The mass passion for homemade cosmetics and, in particular, making face creams with one’s own hands is by no means only connected with the desire to save money on really expensive face care products. By making up creams yourself, you give an individual approach to caring for your own beauty. And having full knowledge of the composition of such cosmetics, you can formulate an active anti-aging strategy. Victory in this war will definitely be yours!
Homemade cream is an excellent option for facial care
Features of application
To please your skin and help it maintain youth for a long time, follow simple recommendations, thanks to which the cream you make yourself will bring a lot of benefits and will not cause harm:
- To prepare and store homemade facial care products, try not to use metal utensils - only glass, ceramic and porcelain; Before use, it must be treated with medical alcohol.
- Be sure to test the finished cream on an inconspicuous area of sensitive skin (behind the ear, on the wrist or the inner bend of the elbow) - if all the ingredients suit you, redness will not occur in this area.
- Homemade creams consist of natural ingredients and therefore do not last long - depending on the composition, they can retain their properties from five days to a month.
- The formulas of homemade creams usually do not include cosmetic fragrances, so their “bouquet” of aromas is exclusively natural.
- Such facial care products should be applied along massage lines, using smooth movements, lightly pressing into the skin with your fingertips.
- Before use, a portion of the cream should be melted a little, warming it with the warmth of your hands, and the skin of your face should be cleansed.
- Try not to get the cosmetic in your eyes.
- In the first half hour after applying the cream, the face should be relaxed, active facial expressions and conversations should be kept to a minimum.
- Excess unabsorbed product should be carefully blotted with a paper napkin.
Homemade cream is stored, on average, no longer than two weeks
Main components and preparation nuances
Homemade creams differ from “branded” creams in much the same way as home cooking differs from restaurant cooking. Professional preparation is beautiful and impressive, but an exclusive one made with your own hands is good because it contains obviously high-quality products. And everyone can learn the secrets of cooking, if desired.
What you might need
What components do you need to prepare to start making homemade anti-aging creams? This directly depends on your skin type, age and what kind of result you expect from using a homemade “potion”.
However, most of the ingredients can probably be found in your kitchen or medicine cabinet. Everything else is easy to buy - in a pharmacy, online store or just in a supermarket. In any case, the cost of a complete set of components will be much less than a ready-made high-quality cream.
So, what should you stock up on before you start getting creative with your cosmetics? Most of the volume of almost any cream is liquid - herbal decoction or mineral water - well, this is just the simplest thing. A beginner’s cream maker’s kit must contain active ingredients—their share in the finished cream does not exceed seven percent. Such components may include, for example:
- yeast, ginger or hop extract - for oily skin;
- oil vitamins A and E, propolis, pollen, pumpkin seed or linden flower extracts - for dry skin;
- oil vitamin F, chamomile extract, peony tincture - for especially sensitive skin.
Vitamins are an important component of most effective creams
Valuable base oils can fill up to a third of the volume of the cream. The most popular of them are the following:
- almond, peach, watermelon, corn, black cumin, grape seeds, milk thistle - for oily skin;
- olive, sesame, jojoba, shea, apricot, peach, macadamia, avocado, coconut walnut - for dry skin;
- lemon, sea buckthorn, St. John's wort, rose, burdock, black cumin, wheat germ - for very sensitive skin.
Essential oils add special chic, aroma and charisma to homemade cream. Here the count is already in drops, and in each formula no more than ten drops of one ether or a mixture of them can act effectively:
- lemon, grapefruit, rosemary, bergamot, lemon balm - for oily skin;
- blue chamomile, sandalwood, myrrh, patchouli, jasmine, rose - for dry skin;
- rosewood, orange, verbena, spruce - for sensitive skin.
Valuable natural oils and esters are present in almost every homemade cream
To give the cream the desired consistency, a small amount of emulsifiers, up to two percent, is added to the mixture. These can be various thickening substances that are harmless to the skin:
- sucrose stearate, starch, cetyl alcohol - for oily skin;
- guar gum, beeswax - for dry skin;
- sodium alginate, stearic acid - for sensitive skin.
How to cook
Homemade creams, oddly enough, are very easy to prepare. The components are either boiled, combined in a special sequence, or simply mixed. For the resulting product to be effective and safe, you will, of course, need at least minimal skills. But it’s not difficult to purchase them either, if you follow the recommendations for cream making:
- Heat the base oil (or other fats) in a water or steam bath to about sixty degrees.
- Without stopping the heating and stirring constantly, add the emulsifier and liquid (mineral water or herbal decoction).
- When the cream thickens enough, remove it from the heat and cool to human body temperature.
- Add active ingredients and esters.
- Wait for the cream to cool completely, transfer it to a tightly sealed jar and store it in the refrigerator.
To make the cream soft and airy, it must be thoroughly whipped.
Of course, each recipe has its own preparation nuances, but in general, all homemade creams are cooked according to the same method.
Night
On calendula
Compound:
- dried calendula inflorescences - 3 tbsp;
- 3 drops of lemon essential oil;
- almond oil – 1 tbsp;
- beeswax - 1 tbsp;
- lemon juice – 1 tbsp;
- calendula oil – 1 tsp.
Cooking process:
- First you need to prepare an infusion based on a herbal component. To do this, pour calendula flowers with a glass of boiling water.
- As soon as the mixture has cooled to room temperature, it is filtered and sent to the refrigerator.
- Next, beeswax is melted, which is then combined with all the remaining ingredients, including calendula decoction.
The resulting product is applied to the skin using a cotton pad. After 20 minutes, you need to wash your face with warm water. The effect of such a product is comparable to the effect of a collagen mask, which smoothes out facial wrinkles and tightens the oval of the face.
Nutritious
Regular use of this night cream increases the elasticity of the skin and also helps to effectively eliminate the first signs of aging.
Grind the egg yolk with a tablespoon of olive oil. Then add 15 g of sea salt, a large spoon of chamomile infusion and ½ teaspoon of honey. In a separate bowl, heat 3 small spoons of Vaseline, then mix it with the previously prepared mixture. The finished composition is stored in a tightly closed jar for no more than one month.
Preservative
Here I use the preservative cosgard. This is a synthetic preservative, but it is absolutely safe for health and is allowed in natural cosmetics. I like the fact that it is compatible with all cosmetic ingredients. The same cannot be said about all-natural preservatives. I only make cream for myself, so it is not practical for me to buy different types of preservatives for different recipes. If you have any other preservative and it is compatible with the ingredients in our recipe today, you can use it. Just follow the dosage suggested by the manufacturer - it may differ from mine.
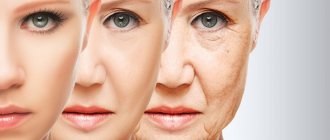
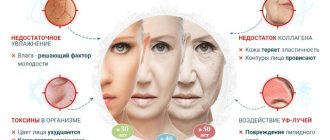
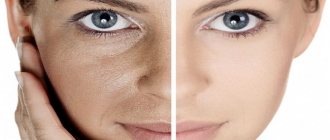
For skin 40+
Starting from the age of 25, irreversible processes occur in skin cells, which subsequently lead to the formation of wrinkles. After 40 years, the epidermis loses its elasticity and firmness with a vengeance due to decreased collagen production. Homemade recipes that promote intensive rejuvenation of the skin will help slow down the processes.
Recipe 1
Heat 200 g of pork fat in a water bath. Then add a large spoonful of honey and a small spoonful of aloe juice to the lard. Stir the mixture until smooth. It is best to use this product as a night treatment.
Recipe 2
Vaseline and castor oil are combined in a 1:2 ratio. Next, the ingredients are heated by adding a large spoonful of honey and a few drops of iodine to the oil mixture. It is recommended to use the finished cream no more than 4 times a week. The product not only smooths out wrinkles, but also helps eliminate acne and comedones.
Recipe 3
Mix homemade sour cream (50 g) with alcohol (1 tsp), freshly squeezed cucumber juice (3 tbsp) and egg yolk. Mix everything thoroughly. At the very end, add 3 drops of any citrus oil.
Signs of dehydration of the skin structure
Even young and healthy skin needs daily hydration, especially in the hot summer, when the epidermis constantly loses valuable moisture. You need to urgently start using moisturizers if your skin:
- became chapped and flaky;
- dry, resembling parchment paper;
- cracked and constantly inflamed and red;
- reacts poorly to temperature changes, as well as dry indoor air;
- changed her appearance and tone.
Replenishing the level of moisture in the epidermal cells is very important, since dehydration provokes the beginning of the aging process and withering of the skin surface!
For skin 50+
The great Coco Chanel argued that at the age of 50 a woman can boast of the face she deserves. If you are not lazy and regularly pamper your mature skin with home remedies, you can easily delay old age by at least 5-10 years.
Recipe 1
Grind the avocado using a blender. Mix 3 large spoons of pulp with one teaspoon of almond and olive oils. Avocado perfectly nourishes and moisturizes the epidermis, increases the production of elastin in skin cells, and also effectively fights age-related changes.
Recipe 2
Currants and persimmons are crushed to a pulp. Using a water bath, heat 30 g of lard combined with two small spoons of olive oil. Chicken yolk, 10 g of honey and liquid vitamin A are added to the resulting mixture. At the final stage, the mixture is combined with the fruit mass, after which a large spoonful of camphor alcohol is slowly introduced.
The jar of the product is stored in the refrigerator.
Recipe 3
Cocoa butter (120 ml) is mixed with sesame and grape oils (1 tsp each). Add vitamin E (3 tsp) and freshly prepared ginger juice (1 tbsp) to the oil mixture. The resulting mass is placed in the oven for 10 minutes, preheated to 70°C. The cream is recommended for use on the face, neck and décolleté.
For eyelids
Based on peach oil
This cream relieves puffiness and smoothes out fine wrinkles around the eyes. You need:
- peach oil – 1 tsp;
- beeswax – ½ tsp;
- purified water – 2 tsp;
- lanolin – 1 tsp.
Lanolin and wax are heated, and when both ingredients are completely melted, combine them with peach oil. At the very end, add water. The resulting mass is cooled to room temperature. Then the cream is placed in a glass container with a tight-fitting lid.
Chamomile
Chamomile-based products are ideal for those with dry, sensitive eyelid skin. Compound:
- 1 tsp dry chamomile inflorescences;
- 1 tsp linden;
- 150 ml boiling water;
- 1 tbsp. butter;
- 1 tsp castor oil.
First, prepare an infusion: pour boiling water over the herb and leave the mixture to infuse for 15 minutes. The finished broth must be strained using a sieve before adding to the cream. The resulting infusion (2 tablespoons) is mixed with butter. Add castor oil to the mixture and mix the ingredients thoroughly again. The product shelf life is 5 days. The cream is applied daily to the skin of the eyelids in the evening.
Active lifting
To prepare the anti-aging composition you will need:
- 2 tbsp. cocoa butter;
- 20 g St. John's wort;
- 1 capsule of tocopherol;
- a few drops of rosehip and lavender essential oils;
- a glass of boiling water.
Pour hot water over the herb and leave the mixture for 20 minutes. The filtered infusion is cooled to room temperature. Melt the cocoa butter using a water bath. Once the butter is completely melted, remove the mixture from the heat and allow it to cool slightly.
The cooled oil is combined with tocopherol, a few drops of essential oils and 2 large spoons of a previously prepared decoction are added to the mixture. Mix the components until a homogeneous structure is formed.
A few basic cooking principles
Preparing homemade face cream may seem complicated and laborious at first. But take this seriously, because it concerns your skin. If you prepare this remedy once, I'm sure it will be much easier next time.
Here are some little secrets for a successful result:
- If you need to melt the product, it is best to use a steam bath. Otherwise, everything may burn.
- Instead of water, you can use a herbal decoction, such as chamomile.
- Beat the mixture well until it hardens completely.
- To make it easier to measure beeswax, grate it.
- It is better to use a sterilized jar to store the cream. This way the product will be stored better.
Well, taking into account all these nuances, you will get a brilliant anti-aging face cream! Let's move on to the recipes.
conclusions
- Home recipes have a cumulative lifting effect. Therefore, only regular use of natural ingredients will bring maximum rejuvenation effect.
- Before using products containing honey, plant extracts and other active ingredients, you should definitely conduct a test to determine an allergic reaction.
- For best results, it is recommended to combine homemade anti-aging creams with moisturizing, nourishing and cleansing masks.
- Remember that home remedies have a minimal shelf life due to the absence of preservatives and stabilizers. The finished cream is stored in the refrigerator for no more than one month.
Features of using home remedies
Home remedies should be used with caution during pregnancy, in the acute phase of chronic diseases, or in case of special skin irritations. During pregnancy and breastfeeding, you should avoid using homemade creams with essential oils.
Homemade formulations containing substances that are aggressive to the skin should be used and stored strictly in accordance with the technology outlined.
Store homemade cream in a glass or plastic container. It is better to apply it with a special cosmetic plastic stick. After use, seal tightly.