Due to the high relevance of this topic, we offer you a master class on sewing a reusable protective face mask.
Let's talk about the popular spring accessory of 2022 all over the world. No, we will not bother you with the need to always wear a protective face mask. But we suggest creating with your own hands not only a necessary, but also a stylish protective accessory. And don’t despair if you don’t have sewing skills - our detailed instructions will help you create a mask for every taste and any complexity.
Pattern of a face mask: template, calculation method for children and adults
Sewing a protective face mask begins with a pattern. To build it, you need 2 main measurements - from one cheekbone, through the tip of the nose, to the second; from the bridge of the nose to the chin.
Standard pattern for a face mask for an adult:
- On a sheet of paper, draw a vertical line along the right edge and lay a horizontal line in the middle to make it easier to construct the drawing.
- Mask length 25 cm/2 = 12.5 cm; width – 16 cm. These are medium sizes that suit almost everyone. We are not immediately intimidated by such dimensions; when sewing, the product will fit well.
Important: For women, a pattern with these sizes does not require seam allowances! For men you need to add 0.5 cm on each side.
- We set aside 8 cm from the horizontal line up and down, and 12.5 cm from the vertical line to the left. We get a rectangle.
- From the most convex part, where the tip of the nose will be (letter D in the figure), we make a bevel for the nose - by 2 cm (letter E), for the chin - by 4.5 cm (letter C).
- Near the ears it will be narrower - 8 cm, so we set aside 4 cm from the center line up and down (segment A-B). And we connect all the dots.
- To see better, lower the line under the eyes by about 1 cm (point ab). To do this, measure the segment E-A and lower it in the center at a right angle. Draw a smooth line.
- The same applies to the convex part in the nose area (point D) - round it off.
- Near the bridge of the nose, you can “cut off” the corner so that it is not sharp. Then the mask will have a smooth transition. Although in any case, when sewing, the product will not have a sharp end.
Pattern for an adult
How to build a children's pattern for a face mask (example up to 10 years):
- Draw a rectangle 11 by 9.5 cm.
- Set aside 1.5 cm on top, 3 cm on bottom; and 3 cm from the central horizontal line on the right.
- We connect all the segments with straight lines. You can immediately draw a smooth line at points E-D-C.
- We mark the middle of the segment E-A and go down 1 cm, put a point. A smooth rounded line under the eyes will pass through it.
For children
Important: If you transfer the pattern without seam allowances, it will last up to 5-6 years. If you make allowances - up to 9-10. Consider the structure of the child's face!
For teenagers and children over 10-11 years old, the mask dimensions are 11 by 13.5 cm. Up to 14 years old without seam allowances, older - with 0.5 cm allowances on each side. The area near the ears can also be increased to 6.5-7 cm.
Template for the mask
- Prepare a paper rectangle 25x18.5 cm.
- Form an octagon: draw 4 segments of 6 cm from the width. Draw a line of 11 cm in the center, divide the corners diagonally. Cut out.
- The second piece is 14x12 cm, divided diagonally in the center.
- Leave pieces on the sides, leaving a centimeter from each edge.
- Cut out the resulting hexagon.
Face mask with a solid pattern in the center, darts and no seam in the middle: an example of a children's mask
Nowadays, especially among young people, face masks are relevant not only with high protective qualities, but also with exclusive designs or patterns. You can make a design version yourself without any problems.
For example, we will use a children's model of a reusable face mask. But the sewing principle is universal and can be used for any size.
Progress:
- Take fabric with a pattern and fold it in half. We apply the pattern to the fold itself.
- 2 cm above and 3-3.5 cm below we mark the lines for darts (do not touch the middle!). Take into account the individual structure of the face at this point - we do not cut the area from the tip of the nose to the chin.
- We trace along the stencil, making seam allowances if necessary (for men). We cut out the upper front part, taking into account the addition of 2 cm in the area near the ears.
Front part
- In this way we cut out the bottom part and the protective layer, but without the extra 2 cm.
- This is what we got.
Cut it out
- We sew the upper and lower darts on the front part, on the lower part along with the protective layer.
Making darts
- You can skip this step, but for the tightest fit, it’s worth making darts on the sides, near the ears. For children, its dimensions are approximately up to 3-3.5 cm by 1 cm, for adults - up to 4 cm by 1.5 cm.
Dart sizes
Example with side darts
- We sew all the parts together, folding them face to face along the top and bottom lines.
Make sure that the central seams match
- We make another line on the bridge of the nose 2-3 mm lower to insert the nose clip. We secure the seam on the sides so that the wire does not fidget.
Inserting the nose clip
- Turn it inside out and smooth it with an iron.
Front and back view
- We sew along the perimeter of the mask 1.5-2 mm from the edge to fix the layers together.
Sew along the front side as close to the edge as possible.
- We work with the side part - we wrap 2 cm of the front part onto the wrong side. We make 2 turns. Sew along the very edge of the folded side.
Closing the side
- We insert the elastic bands and secure them “at the entrance”. For this purpose, use a zigzag stitch or sew a regular seam several times. And our mask is ready for use!
Fastening the elastic band
This is what the mask looks like with and without a side dart. The fit is sufficient in the second case, but in the first version it is better near the ears.
Example of two models
Multi-layer protection
Multi-layer, reusable pad provides continuous protection for 2-3 hours. Then it is carefully placed in a plastic bag, processed and ironed. Before making a gauze mask for a long period, you need to choose high-quality high-density gauze or bandage.
You will need:
- wide medical gauze bandage (sold at the pharmacy);
- elastic cord;
- ruler;
- cutting chalk or marker;
- scissors;
- needles;
- threads;
- sewing machine.
How to sew a double-sided fabric face mask: instructions
For this model of protective face mask we use a standard pattern.
- We cut out 4 parts for the filter from thicker fabric, 2 parts for the lower part. In the nose area, along the rounded line, we make a seam allowance of 0.5 cm (and for women too).
- For the outer/front side, we cut out 2 parts, but extend the side near the ears by 2 cm so that it is convenient to insert an elastic band.
Cut out completely
- We fold the internal parts facing each other, with a protective layer on top. Together we sew along a rounded line with an indentation of 0.5 cm from the edge. This is how we sew the front parts together.
- We unfold our “petals”, straighten the cuts well to the sides with an iron.
Straightening the cuts
- We sew 1.5-2 mm from the central seam in both directions along the front side.
Central seams
- Fold the front and bottom pieces face inward and sew at the top and bottom. Insert the nose clip and secure it.
View from the back side
- We turn the product inside out, straightening the seams well, and sew along the contour with an indentation of 1.5-2 mm.
We make lines along the edge
- Now we wrap the “tails” of 2 cm inward on the wrong side. In this example, we immediately fastened the elastic band manually to the fabric, and wrapped the piece together with it. We sew along the very edge of the turn, immediately sewing on the elastic. But you can insert it using the first example.
Final result
Headband for children
Convenient to use, fits well on the nose, does not move or roll down. Additionally, a plastic fastener is sewn in, which can be pulled out of an old gauze face mask. What you will need:
- prepared fabric;
- elastic or lace;
- marker;
- scissors;
- pins;
- needles, threads;
- special template.
Action plan:
- Print the templates or transfer them onto paper. Cut and make patterns with an additional allowance of half a centimeter.
- Place the prepared elements on top of each other, keeping the lines consistent, with the pattern inward. Sew on the side.
- Turn the pattern outward, make a double fold on the sides, forming a small hole for the straps. Thread a rubber band or elastic cord.
Recommendation! Additionally, you can sew a pocket for the filter from gauze or cotton wool, located at the level of the nostrils and mouth.
How to sew a protective face mask with a pocket for a filter?
This version of a protective face mask is similar to the previous one, the only difference is that the bottom layer needs to be made 2 cm shorter than the main, middle part.
- We cut out 3 layers of 2 halves of the mask (the front part is 2 cm longer), sew along the circumferential side, immediately turn the bottom part 2 times to the wrong side and make a stitch as shown in the photo below.
- On the front side we place a stitch 1-2 mm from the central seam, having first straightened the cuts in different directions.
- We fold the parts: we place the front part face up, then the bottom layer (aka pocket) goes face down, and the middle protective layer goes on top face down.
- We sew the details. We cut off the excess, turn it inside out, and make a control line along the contour. We insert a wire into the area near the nose and fix it.
- We turn 2 cm of the front part onto the wrong side, sew the edge of the fold without touching the bottom layer.
- Sew on the elastic bands.
Algorithm
How to sew a 3D face mask with sides?
This model fits tightly to the face in any area. To sew a reusable 3D face mask, you need to use the following pattern:
- We measure the distance from the tip of the nose to the chin and the length from cheekbone to cheekbone (through the nose). For example, we will have a size of 23 by 7 cm. Add 2 cm for seam allowances: 7 + 2 = 9 cm - this is the width of the mask
- 23+2=25 cm is its length
Pattern
Sewing process:
- We cut out 6 parts according to the pattern - 4 from the main fabric, 2 for the inside.
Details
- We fold the main part from two main parts with the wrong sides facing each other and place a protective layer inside.
- We fold the remaining two parts of the main fabric in half, and cut the inner layer into 2 parts. We manually sew a wire onto one of them. If you are using a bread clip, do not cut out just the wire itself, leave a little plastic part for ease of sewing. The needle passes through this material well.
We fold
- We sew the parts that are folded in half along a straight line as shown in the photo.
Flashing
- We cut off these sides of the mask and the inside of the main part by 2 cm. Fold the “sandwich” in this way (indicated in the photo). We make a line along the edge, cutting off the excess as close to the seam as possible.
Connecting
- Turn the workpiece inside out. We make a stitch along the edge of the front part to hide the seam.
Sew along the front side
- All that remains is to wrap the side parts 2 times, stitch, insert the ends of the elastic into the holes and secure.
Insert rubber bands Final result
What fabric is best to make a medical mask against viruses?
- How to make a MASK FROM WET WIPES and rubber bands with your own hands
Everyone has the material to sew a reusable medical fabric mask. It should be a fairly “loose” (you need to breathe through it normally) fabric made from natural fibers:
- chintz;
- calico;
- batiste;
- muslin;
- flannel;
- linen;
- silk.
Do-it-yourself masks are mainly sewn from cotton fabric. You can use, for example, old bedding or unnecessary children's clothing. If there is nothing like that, even gauze and a bandage will do. But the product will not look very presentable.
- How to make a medical MASK FROM DISPOSABLE paper towels and elastic bands
Fans of all kinds of life hacks offer more exotic options:
- kitchen “waffle” towel;
- filters for vacuum cleaners;
- covers for antimicrobial pillows.
What is sold in pharmacies is made from two layers of spunbond with a density of 17 g/m², with a meltblown “filter” between them. This is also a non-woven material, but it is denser, since its fibers are smaller and laid more evenly. Spunbond can be purchased without problems and very inexpensively where sewing goods are sold, or replaced with a dried damp cloth or dust cloth from a large roll. It is problematic to buy the second material, but for those who want to sew a medical mask from fabric at home, its availability, in general, is not important; you can replace it with the same spunbond.
Synthetics and wool will not work. The first prevents normal air exchange; a “microenvironment” with high humidity and temperature is formed under it. Such conditions are very favorable for any viruses, bacteria, microbes. And 100% wool simply rubs the sensitive skin of the face.
Face mask without pattern, with folds
To sew this protective face mask, you will need a piece of fabric 20 by 36 cm (for greater density, you can take 2 pieces), 2 strips for the side edges 5 by 10 cm (can be of a different color) and elastic bands of 15-17 cm.
Sewing algorithm:
- Fold the main piece in half and stitch on the wrong side at a height of 20 cm.
- Turn it inside out and iron it. Place the seam at the bottom, sew a clip at the top of the fold.
- Step back 3 cm from the edge, draw a line, mark 1.5 cm - this will be the first fold. Next, follow this pattern: 2.5 cm is the height of the fold, 1.5 is its depth. As a result, you will get 3 folds, each of which is secured with pins or clips on both sides.
We sew in a clip and make folds
- Stitch about 0.5cm from the edge, securing the folds. Iron the mask first.
We fix
- Place the elastic bands as shown in the photo below (on the front surface) and secure them with a seam.
Sew on elastic bands
- Fold the strips in half, right side out. Place it on top of the elastic bands, fold the excess part on the sides to the other side and make a stitch along the edge by 0.7 cm. Trim off the excess.
Sew the side part
- Unscrew the strip (see photo below) and turn it over to the other side so that the elastic is on the side. To do this, we bend not only the side strip itself, but also add a little of the main part with folds.
Wrapping it up
- Sew along the edge of the fold.
Ready!
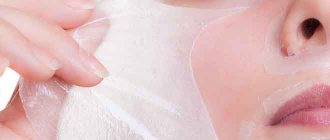
Purpose of various impregnating compositions
Fabric impregnation can be in the form of a cream or gel. Its composition for various masks is selected based on the characteristics of the skin:
- To make the surface of a tired face smooth, give it a fresh look and remove swelling and flaking, you need to choose a composition containing extracts of plants such as chamomile, hazel, pomegranate and lavender. In addition, this composition improves complexion, creating the effect of inner radiance.
The effect of fabric masks depends on the composition of their impregnation - To rejuvenate aging skin, restore its elasticity and normalize metabolism, you should use a composition that includes hyaluronic acid, glycerol, substances made from algae and placenta, as well as antioxidants. This composition also helps smooth out wrinkles.
- An anti-inflammatory composition, which includes zinc microparticles, echinacea and aloe, will help improve the condition of oily and problem skin. This composition provides an effective effect on pimples and blackheads.
All types of compositions, among other things, provide regeneration of cellular tissues and their deep hydration.
Quick face mask in 5 minutes even without a sewing machine
Important: For such a face mask, neoprene or polychloroprene would be the ideal option. These are sheets of foam rubber. Therefore, it does not fray or tear, but it stretches well and does not wrinkle. In addition, it is very dense and breathable.
We offer a universal pattern option.
Pattern
And so, let’s proceed to the actual process of sewing a protective face mask:
- Cut out the stencil according to the pattern. We use only thick fabric for the base; thick knitwear is suitable for replacement. We transfer the stencil with an indentation of 0.5 cm from the rounded area and cut out two parts of the mask.
- Please note that for the opposite side, the pattern should be turned over to the other side so that the details are the same. Or immediately fold the cut in half.
Transferring the stencil
- Next, fold the parts of the mask with the wrong sides inward. Despite the aesthetics, the seam should be on the front side so as not to rub the skin or interfere.
Putting the parts together
- We sew with a simple seam (state stitch), and then finish the edge with a buttonhole stitch. Because of such a simple algorithm, you can do without a sewing machine, just make all the stitches neat and tight.
Stitching
- If you have a machine, then make a seam in the middle, retreating 0.5 cm from the edge. Unfold the seam and use a zigzag stitch on both sides. Ready!
Work with a buttonhole stitch
Life hack: To avoid creating a pattern, you can resort to a little trick - take a regular disposable medical face mask. Fold it in half, straighten it like an accordion and outline it in shape. You can extend the ears arbitrarily, creating smooth curved lines.
Result
What tools and materials are needed for sewing?
To sew a medical mask from fabric yourself, you will need:
- a piece of fabric of suitable quality and size;
- elastic band (can be replaced with a regular elastic band);
- a pencil for drawing on fabric (chalk or soap will do);
- ruler (20 cm long is enough);
- scissors (except for manicure scissors, you can take any);
- tailor's pins (not safety pins, but with an "eye");
- sewing machine (or needle) and thread;
- iron.
Those who are sewing something for the first time may also need paper with a pen and pencil. It is better to first draw the pattern on a sheet of paper, then cut it out and transfer it to the fabric.